Removing Acne, Skin Blemishes With The Spot Healing Brush In Photoshop
Step 1: Add A New Blank Layer
The Background layer contains the original image.
Even though our goal is to make the photo look better, we still want
to protect the original, so let’s add a new blank layer above the
Background layer. We’ll do all of our spot healing work on this separate
layer. Click on the New Layer icon at the bottom of the Layers panel:
Clicking the New Layer icon.
Step 2: Rename The New Layer
Photoshop adds the new blank layer above the Background layer, but by default, it names the layer Layer 1. That doesn’t tell us much about what the layer is being used for, so double-click directly on the layer’s name in the Layers panel and rename it "spot healing". It’s not uncommon when retouching images to end up with lots of layers, and givingeach one a descriptive name makes it easier to keep them organized. Press Enter (Win) / Return (Mac) when you’re done to accept the new name:
Renaming the new layer.
Step 3: Select The Spot Healing Brush
Select the Spot Healing Brush from the Tools panel. You’ll find it grouped in with the other healing tools. If one of the other tools is showing in place of the Spot Healing Brush, click on the tool and hold your mouse button down for a second or two until a small fly-out menu appears, then select the Spot Healing Brush from the menu:
The Spot Healing Brush is grouped in with the other healing tools.
Step 4: Select The “Sample All Layers” Option
By default, the Spot Healing Brush works only with the layer that’s currently selected in the Layers panel. That will cause us some problems if we try to use it right now since we have a blank layer selected, which means all we’d be able to do is replace nothing with different nothing. We need to tell Photoshop to look at the image on the Background layer as well. To do that, select the Sample All Layers option in the Options Bar along the top of the screen:
Selecting the Sample All Layers option in the Options Bar.
Step 5: Select “Content-Aware”
If you’re using Photoshop CS5 or later, make sure you have Content-Aware selected in the Options Bar. This feature is new in CS5 and allows the Spot Healing Brush to more intelligently choose good replacement texture for the problem area you’ve clicked on, using texture from the surrounding area. If you’re using CS4 or earlier, you won’t have Content-Aware available. In that case, you’ll want to select Proximity Match which can still give you great results:
Select Content-Aware for best results (or Proximity Match for CS4 and earlier users).
Step 6: Click On The Problem Spots To Heal Them
With the Spot Healing Brush, Sample All Layers and Content-Aware (or Proximity Match) selected, all we need to do now is click on problem areas in the image to fix them! I’ll zoom in on an area of the girl’s face so I can see the problem spots more clearly, then I’ll move my brush cursor over one of the pimples and adjust my brush size with the left and right bracket keys so it’s just slightly larger than the pimple itself (I circled the brush cursor in red just so we can see it more clearly in the screenshot):
Use the keyboard shortcut to make the brush cursor a bit larger than the problem spot.
I’ll click on the pimple with the Spot Healing Brush, and just like
that, it’s gone, replaced with good texture from the surrounding area: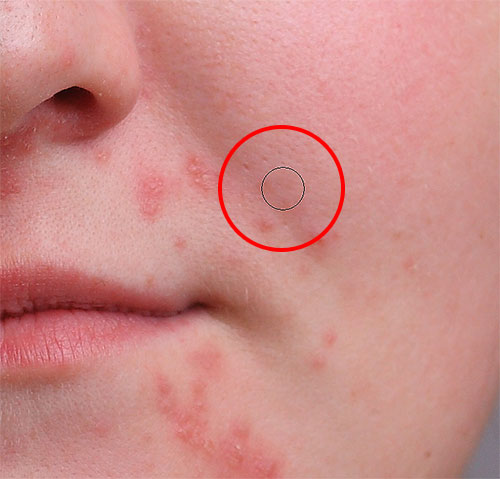
One click is all it took to remove the pimple.
As I mentioned earlier, sometimes the Spot Healing Brush can make a mistake, so if that happens, just press Ctrl+Z (Win) / Command+Z
(Mac) to undo it and try again. Each time you try again, you’ll get a
different result. I’ll continue clearing up other pimples in the area
by moving my brush over them, adjusting its size with the left and
right bracket keys, and clicking: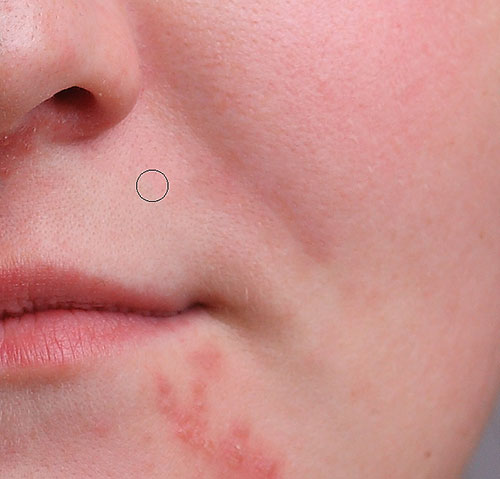
More pimples have been cleared up with just a few simple clicks of the mouse.
Let’s move down to her chin where we see some larger problem areas: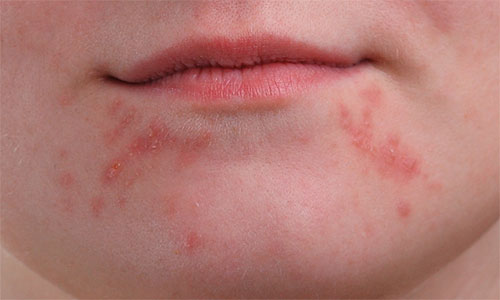
Larger clusters of pimples can be a bit more of a challenge.
To retouch these areas, I’ll start by clicking on the smaller, isolated pimples to heal them first and get them out of the way: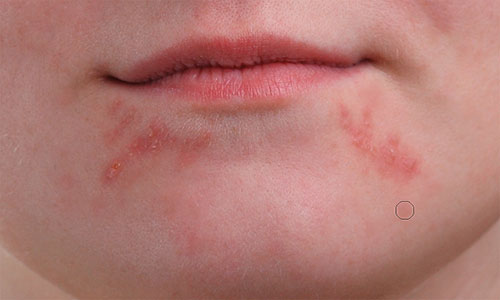
Removing the isolated pimples before moving on to the larger areas.
Then, rather than trying to fix a large area with a super wide brush
and a single click, I’ll approach and retouch it in smaller sections,
beginning from the outside and making my way inward. Along with clicking
the Spot Healing Brush, you can also click and drag in short strokes.
As you drag, your brush stroke will appear black: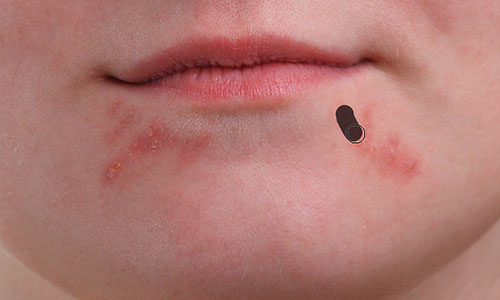
Dragging a short brush stroke across the area.
Release your mouse button and Photoshop attempts to heal the area with surrounding texture: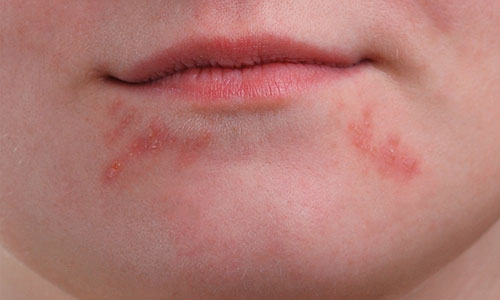
Releasing the brush to heal the area.
I’ll continue clicking and dragging over the area one small section
at a time, going back over any problem spots as needed with additional
clicks, and after just a couple of minutes worth of effort, Photoshop
was able to do a pretty good job: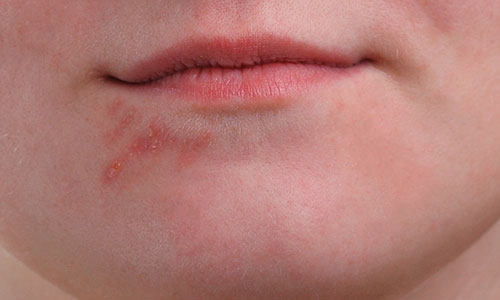
The area on the right is now looking a lot better.
I’ll do the same thing for the area on the other side, using a small
brush and a series of clicks and short brush strokes to tackle the area a
little at a time. Here’s the result, again after just a couple of
minutes worth of effort: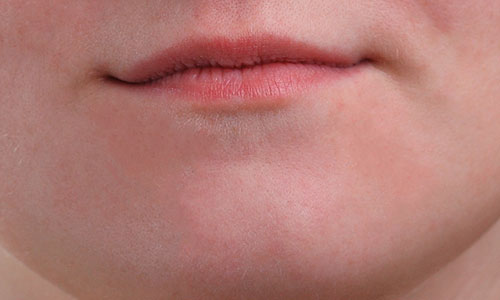
Her chin is now pimple-free thanks to the Spot Healing Brush.
There’s one larger problem area remaining, and it’s directly under her nose:
A few more pimples left to retouch.
Once again, I’ll start by clicking on the individual, isolated
pimples to heal them, keeping my brush just slightly larger than the
pimple itself:
Healing the smaller areas first.
Then I’ll use a combination of clicking and dragging with a small brush to heal the remaining area: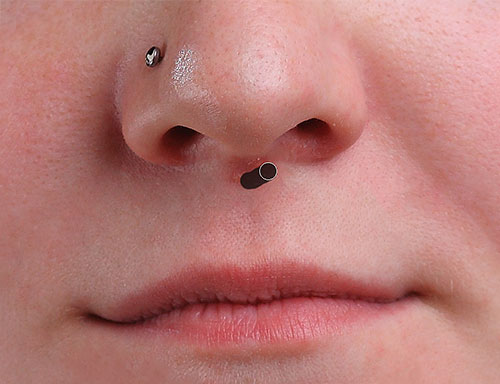
Clearing up the last of the pimples.
The area is now pimple-free, with healthy skin texture in its place: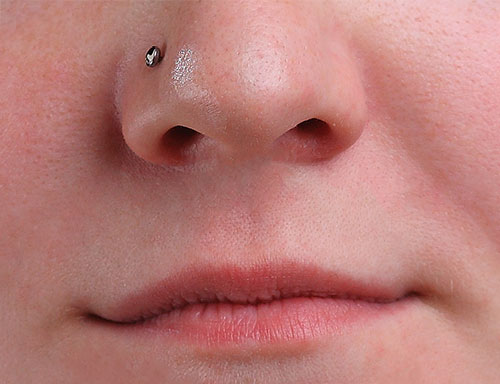
Another great job by the Spot Healing Brush.
The Lighten Brush Mode
If you’re using the Spot Healing Brush to remove acne or other skin problems as I am here, you’ll often get even better results by changing the Brush Mode in the Options Bar from Normal (the default setting) to Lighten::
Try the Lighten brush mode when fixing skin problems.
With the brush mode set to Lighten, Photoshop will only replace
pixels that are darker than the good texture data. Since pimples and
other skin blemishes are usually darker than normal skin tone, only the
pimple or blemish itself gets replaced, leaving more of the original
image surrounding it intact. If a blemish happens to be lighter than the
normal skin tone, use the Darken mode. You can quickly
switch between all of the brush modes for the Spot Healing Brush from
your keyboard by holding down the Shift key and pressing the + or –
keys.Here, once again, is what the original photo looked like:
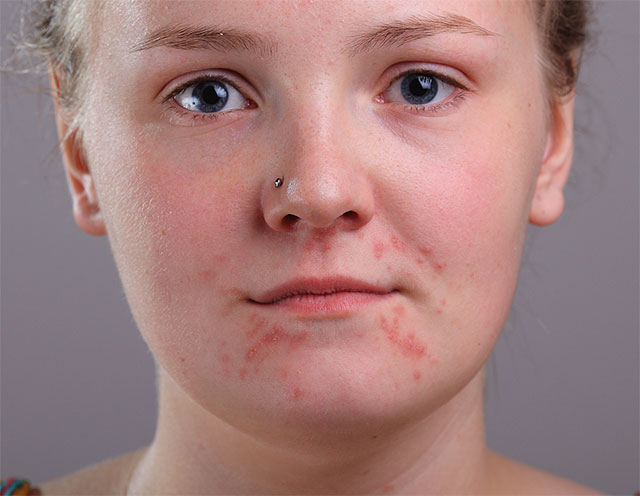
The original untouched image.
And here’s the final retouched result: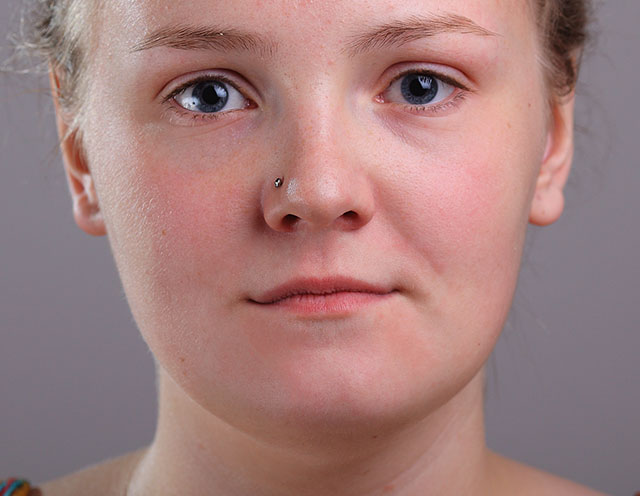
The final result.

Comments
Post a Comment